Howto add a MIME type to IIS – broken download links when using IIS

Sometimes you´ll find yourself in the situation that users complain about broken download links on your website but you can´t figure out why. Because the files are there, the links are good and the webserver is working fine as well.

If your webserver is an IIS (Microsoft Internet Information Services) then it probably misses the MIME type for the file to download.

So here´s the solution:

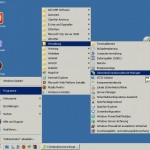
  1. Log onto your server and start the internet information services manager (IIS manager)
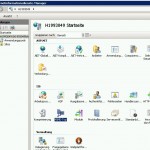
  2. Select your server from the connections panel on the left and double click MIME-Type in the IIS section of the panel on the right
  3. Now you can see all the MIME-Types that are already registered and known to the server
  4. Scroll down to see if your extension is already registered (e.g. “.7z” for the 7z compression standard)
  5. If your extension is already listed there, then this is not the solution for your problem. Sorry !
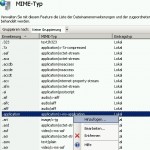
  6. If your extenion is not listed there then do a right click somewhere and choose “Add” from the menu
  7. Enter the extenion – for 7z it would be “.7z”, for ISO image it would be “.iso”
  8. Now enter the MIME-Type depending on what extension you want to register. For 7z it would be “application/x-7z-compressed” and for ISO it would be “application/octet-stream”.
  9. Test your download links – if it works, good. If not you have to restart your IIS.
  10. You´re done !

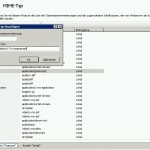
See the screenshots below to see what to do and where. They are from a german version of IIS, but the general structure is the same as in the english version.


Howto do a Bios Update without a floppy disk drive

Doing a bios update nowadays can be quiet difficult if you have no floppy disk drive – especially if you plan to do it on a rather old mainboard like the Tyan Thunder N3600R. The flasher for the bios needs to be run from a clean DOS environment without any memory handlers (like EMM386 or HIMEM.SYS) loaded. This tutorial was made especially for the Tyan Thunder N3600R bios but should work fine with any oldschool bios flasher that needs to be run from a clean DOS environment.

So here we go if you have no floppy drive, but a cd drive and a hard disk.

Prerequisite:

1.) You need the Ultimate Boot CD Version 3.2. – you can download it from here. The most recent version of the Ultimate Boot CD can be found here http://www.ultimatebootcd.com, but later version than 3.2 don´t have the boot disk we need so for this tutorial you should stick with version 3.2.

2.) Burn the downloaded ISO from step 1 to a CD (bootable).

3.) You need a hard disk with at least one free partition which must to be formatted with FAT32 (NTFS won´t work) and remember the drive letter (f.e. C: or D:).

4.) You need the bios files you want to flash and the flasher.

5.) Copy the bios files and the flasher to the FAT32 partition onto the hard disk from step 3.

Once you´ve done that, now the important part:

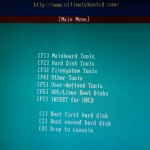
6.) Boot your PC from the CD you have burned in step 2. You should see the Ultimate Boot Disk 3.2 main screen.

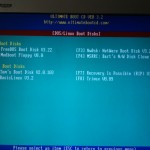
7.) Press “F6” for Dos / Linux Boot Disks.

8.) Press “F3″for NwDsk: Netware Boot Disk.

9.) You can now see the NwDsk Boot Disks main screen.

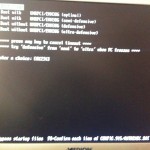
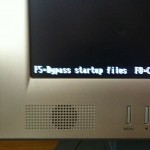
10.) Quickly press “F5” (Bypass startup files) otherwise it will load the wrong configuration.

11.) You´ll now find a DOS prompt waiting for your input.

12.) Navigate to the partition (drive) where the bios files and the flasher are by typing “C:” or “D:” (depending on the drive letter you remembered from step 3).

13.) Start the flasher by typing “flash” (if you don´t know what´s the name of the flasher type “dir” to see all files and then search for an executable (*.bat, *.exe,*.com).

14.) The bios flasher will start and flash a the new bios. From now on follow the instructions on the screen and NEVER turn off your PC while the flasher is running.

15.) You´re done.

Thx to the people at http://www.ultimatebootcd.com/ for their great work !


Howto redirect or forward a link / url via .htaccess

If you want to redirect / forward a link / url the easiest solution is to use a .htaccess file. You need to place it in the directory where the user would normally land with the original link.

The general structure is simple. You´ll only need to enter one single line in the .htaccess file:

Redirect permanent old location new location

  • old location must be a relative link to root of your server structure, e.g. /wwwroot/index.html
  • new location must be a full link, e.g.  http://www.yoursite.de/index.html

So in case you want to redirect http://www.mysite.com/index.html to http://www.my-new-site.com/index.html your .htaccess file needs to be placed in the same directory where the index.html is and should look like this:

Redirect permanent /wwwroot/index.html http://www.my-new-site.com/index.html

If you want to redirect something like this http://www.mysite.com/uploads/12/myuploadedfile.rar to this new location http://www.my-new-site.com/download/myuploadedfile.rar then your .htaccess file needs to be placed in the “12” directory and should look like this:

Redirect permanent /wwwroot/uploads/12/myuploadedfile.rar http://www.my-new-site.com/download/myuploadedfile.rar

Remember: The /wwwroot/ can be different on your site / server. You need to find out the webservers document root. A common directory is also /public_html/.

Thx to the RBI @ Uni Frankfurt – see their site for more information about url redirecting (only in german).


Firefox konnte nicht gestartet werden, weil die Anwendungskonfiguration nicht korrekt ist / Firefox failed to start because the application configuration is incorrect


After updating my Firefox to version 10 it refused to start. I tried a lot of things but nothing helped. Today I finally found a solution for this issue. It´s a problem with Microsoft Visual C++ 2005 and it appears mainly when you´re using Windows XP 32-bit with Service Pack 3. So here´s the solution:

1.) You need the Microsoft Visual C++ 2005 Service Pack 1 Redistributable Package ATL Security Update from here: http://www.microsoft.com/download/en/details.aspx?displaylang=en&id=14431

2.) Be aware that you download the correct package:

  • vcredist_x86.exe – for Windows XP, Windows Vista and Windows 7 (32-bit version – recommend for most users)
  • vcredist_x64.exe – for Windows XP, Windows Vista and Windows 7 (64-bit version)
  • vcredist_IA64.exe – for Intel Itanium based computers

3.) After the download finished, install the update

4.) Restart your computer

5.) Enjoy your working Firefox


Geheimakte 2 startet nicht unter Windows 7 (64bit und 32bit)

(only in german – sorry)

Als ich neulich mal wieder Geheimakte 2 spielen wollte, verweigerte es unter Windows 7 nach der Installation hartnäckig seinen Dienst. Es kam immer die Fehlermeldung, dass es mit Administratorrechten ausgeführt werden muss. Schuld daran, waren die TAGES-Kopierschutztreiber.

Das Problem lässt sich aber glücklicherweise schnell beheben:

Geheimakte 2 ganz normal installieren. Danach die TAGES Treiber über die Links unten oder über http://tagesprotection.com => Drivers herunterladen. WICHTIG – es gibt unterschiedliche Treiber für die 32- und 64bit Versionen von Windows 7. Die Treiber als Administrator installieren (Klick mit der rechten Maustaste auf die Setupdatei und “Als Administrator ausführen”) und danach Geheimakte 2 ganz normal starten.

Viel Spaß !!!

http://tagesprotection.com/5.5/TagesSetup.exe (32bit Windows 7)

http://tagesprotection.com/5.5/TagesSetup_x64.exe (64bit Windows 7)


Android on Samsung i8320 / H1 – H1droid / CyanogenMod

Update 2: This version is outdated ! Head over to http://samsungi8320.freeforums.org/ for newer and improved versions.

Update:

I had to change the link for the H1droid rom (step no. 3) – you can now find it here:

Download (tar, 101 MB)

Recently I bought a Samsung i8320 / Vodafone H1 for cheap money on eBay. It´s quite good Smartphone with 16 GB internal memory. And there´s a CyanogenMod rom with Android Gingerbread 2.3.7 available. So here´s a short tutorial how to flash the phone. I did it on Windows XP, but it should also work on Windows 7.

All credits go to the great people at http://samsungi8320.freeforums.org, especially Clint and rogerbraun. Great work guys, keep it going !

Warning: There are several methods how to flash the Samsung i8320. With this method you´ll lose all the data on your phone. And in case you won´t like H1droid, there´s not an easy way back to the Samsung OS. If you wanna know more about the different methods go check out http://samsungi8320.freeforums.org.

0.) In case your phone has a micro sd-card installed be sure to remove it before you continue with this tutorial.

1.) Download Samsung Kies from this location http://samsung.de/de/consumer/kies.aspx and install it. Do not connect your phone to your PC.

2.) Download Odin from here and extract it to a folder on your hard drive. We´ll need it later.

3.) Download the H1droid rom from here (with Google Apps) or if you wanna be sure to have the latest version go there http://samsungi8320.freeforums.org/r3d4-latest-no-sd-card-needed-no-formatting-needed-t617.html (roms available with and without Google Apps) and save the *.tar in a folder on your hard drive.

4.) Start Samsung Kies and connect your phone via USB to the PC. Select “mass storage” (mode) if the phone asks. Wait until all drivers are successfully installed.

5.) Remove the phone from the USB cable, turn it off and close the Kies application.

6.) Restart the phone by pressing the following buttons at the same time: camera button + volume(-) button + power button. The phone should start and show you a black screen with “Downloading” and a blank status bar. If it does not, try again.

7.) Reconnect the phone via USB. If Samsung Kies will start automatically please close it.

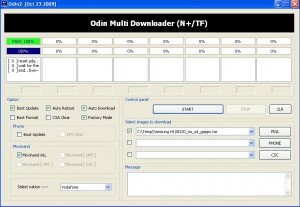
8.) Start Odin and click the PDA button. Choose the H1droid rom from your hard drive (the i8320_no_sd_gapps.tar file).

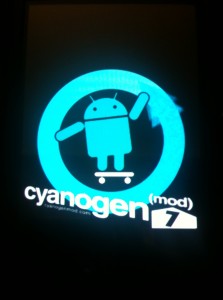
9.) Hit start and pray. Odin will now try to flash your phone. If everything works well you´ll see the progress in the left upper corner. The former blank status bar should slowly start to grow and your phone will restart. While restarting you should see the CyanogenMod boot screen.

10.) Even if promted by your phone to choose a setup option for Android wait until Odin finished the process.

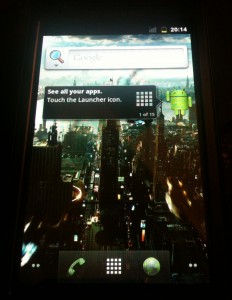
11.) You´re done. Enjoy H1droid !


The uploaded file could not be moved to – WordPress 3.3.1

Update – 25.01.2012

I still haven´t found a good solution for the problem. Several people report that they were able to solve it , by changing the owner of the “uploads” directory (to the user which php runs as (in most cases “wwwrun”). But that didn´t worked for me. The only solution I found was to run php as FastCGI and not as an Apache module. This solution though has some drawbacks. You need to configure a single php.ini for every virtual host you run and you can´t use .htaccess files anymore.

My conlusion – FastCGI resolves the problem but doesn´t cure the root of all that evil.

I guess the WordPress 3.3 and 3.3.1 are the worst releases the WordPress Team ever did. First the fucked up the visual editor and now the shittiest WordPress problem ever: “The uploaded file could not be moved to” – a problem occuring when you try to upload images/videos/media (and when your php runs in safe mode).

In older WordPress versions it could be easily solved by chmod 777 the “uploads” folder within “wp-content”. Now this doesn´t work anymore.

One solution is to chmod 777 “wp-content” completely. But they can´t be serious about that…can they ?

WordPress Visual Editor broken after Update 3.3.1 (again)

Update 2 – 10.01.2012:

I was asked about the “Use Google Libraries” plugin for WordPress – here it is: http://wordpress.org/extend/plugins/use-google-libraries/

And this explains why you may wanna use it, even if your visual editor works fine: http://encosia.com/3-reasons-why-you-should-let-google-host-jquery-for-you/

Thx Dave !

Update – 10.01.2012:

Wow – I found a new method to fix it. But honestly I don´t believe in it and wouldn´t recommend it further. But for me it worked (NO joke).

I wrote this text below with the Wordpres iPhone App because I couldn´t use the web cause the visual editor was broken. And after this article was successfully posted from the iPhone, I tried the visual editor again. And now it worked. Crazy ?! I think so…

Grrrrrrrrr…after updating to 3.3.1 the visual editor is broken. Again. The same shit happened after updating to 3.3. Last time I fixed it by installing the “Use Google Libraries” plugin. This worked fine for 3.3. But it doesn’t seem to work for 3.3.1. And the WordPress support groups are not a real help. Definitely not…damn !!!

Odys Space Tablet – Rooten & vorinstallierte Apps löschen

(only in german – sorry)

Rooten

Wer einige der vorinstallierten Android Apps loswerden, oder aber die Vorzüge eines Root Zugangs auf seinem Odys Space nutzen will, der muss das Tablet schlicht und einfach rooten. Und das ist mit Hilfe von PdaNet (http://junefabrics.com) und SuperOneClick 2.2 (http://shortfuse.org) unter Windows XP SP3 einfacher, als sich einen Kaffee zu kaufen.

1.) PdaNet und SuperOneClick downloaden und auf dem PC installieren

2.) Bevor das Odys Space per USB mit dem PC verbunden wird, “USB-Debugging aktivieren” (Einstellungen – Anwendungen – Entwicklung)

3.) Odys Space per USB mit dem Rechner verbinden. PdaNet meldet sich und fragt, ob die Internetverbindung (Tether) gestartet werden soll (siehe Bild 1). Das kann man ignorieren.

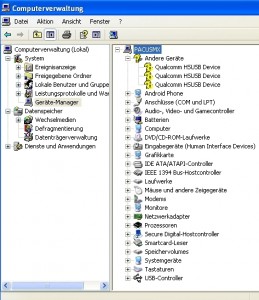
4.) Windows will diverse Treiber installieren, meckert aber das es keine Treiber finden kann. Einfach immer durchklicken. Am Ende erscheinen im Geräte Manager bis zu 3 Geräte mit gelben Ausrufezeichen (siehe Bild 2), das kann man aber getrost ignorieren.

5.) SuperOneClick starten, dort auf Root drücken und dann warten. Das Tablet startet neu und danach ist es schon gerootet. SuperOneClick fragt noch, ob man Busybox installieren möchte (auf dem Tablet). Das sollte man tun, da es einige nützliche Tools enthält.

6.) Sollte das Tablet nicht neustarten sondern beim Android Bildschirm stehen bleiben, dann entweder über den Ein-/Aus Knopf komplett ausschalten. Falls das auch nicht geht, den Reset Knopf auf der oberen Seite drücken.

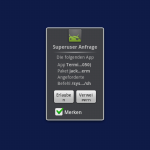
7.) Nach dem rooten findet man eine neue App vor mit dem Namen “Superuser”. Mit Hilfe dieser App wird protokolliert und überwacht, welche anderen Apps vom Root Zugriff gebrauchen machen wollen und man kann dies je nach Bedarf erlauben oder ablehnen.

Vorinstallierte Apps löschen

Das Odys Space wird mit einigen vorinstallierten Apps ausgeliefert (Aldiko eBook Reader, GetJar, etc.). Wer diese nicht unbedingt braucht, kann sie NACHDEM das Tablet gerootet wurde einfach löschen. Aber Achtung – die Apps sind dann schlicht und einfach weg. Es gibt hier mehrere Wege die zum Ziel führen. Ich beschreibe mal einen, der gleichzeitig die Konsole (Kommandozeile) mit ins Spiel bringt.

1.) Die App Terminal Emulator aus dem Android Market herunterladen (https://market.android.com/details?id=jackpal.androidterm) und auf dem Tablet installieren

2.) Eine File Manager aus dem Android Market herunterladen, z.B. ES File Explorer (https://market.android.com/details?id=com.estrongs.android.pop) und auf dem Tablet installieren

3.) Den ES File Explorer starten und zum Pfad “Telefon/system/app/” navigieren. Dort befinden sich die vorinstallierten Apps.

4.) Genauen Namen der App aufschreiben / abfotografieren / sich irgendwie anders merken (bspw.: de_androidpit_appcenter_axdia_v1510-T9NT2QZJ.apk). Unbedingt auf Groß- / Kleinschreibung achten.

5.) Terminal Emulator starten und der App den Superuser Zugriff erlauben

6.) “su” für Superuser eingeben und mit “Enter” bestätigen

7.) Mit dem Befehl rm /system/app/ wird die App dann sofort gelöscht (bspw.: rm /system/app/de_androidpit_appcenter_axdia_v1510-T9NT2QZJ.apk)

8.) Schritte 4-7 solange wiederholen, bis alle nicht gewünschten Apps gelöscht sind


Test – Odys Space Tablet

(only in german – sorry)

Update – 19.12.2011 (Verarbeitung, Sound, Akku)

Tja, wie so oft im Leben braucht man manchmal etwas länger, um etwas genau(er) bewerten zu können. In diesem Falle betrifft es gleich 3 Kategorien. Und nur bei einer gibt es Positives für das Odys Space zu vermelden. Fangen wir mal mit der Verarbeitung an. Nach der Installation einer Screenshot App auf dem frisch gerooteten Tablet schüttelte ich es um einen Screenshot auszulösen (wollte die App so). Und da klapperte etwas. Etwas Großes ! Ich war zunächst leicht ungläubig, doch ein erneutes Schütteln bestätigte meinen Eindruck. Irgendetwas Großes innerhalb des Tablets ist nicht richtig befestigt. Da sich das Odys Space leider nicht so leicht öffnen lässt, kann ich bis jetzt (noch) nicht sagen was es ist. Weiterhin ist es eine wahre Kunst das Micro USB Kabel so einzustecken, dass es tatsächlich in der Buchse bleibt und nicht sofort wieder raus rutscht. Sehr ärgerlich !

Der Sound über die eingebauten Lautsprecher ist ja gar nicht so schlecht. Der Kopfhöreranschluss wiederum hat einen seltsamen Bug, dessen genaue Ursache ich noch nicht herausfinden konnte. Offensichtlich kann Software-seitig zwischen verschiedenen Ausgangspegeln umgeschalten werden. Wie das genau funktioniert und wie man welchen Pegel selektiert – keine Ahnung. Ich konnte es bisher nur durch konsequentes Rein- und Rausziehen ändern. Denn ist der Ausgangspegel auf hoch eingestellt, rauscht der Kopfhöreranschluss unglaublich stark und die Musik klingt als wäre ein schlechter Telefonfilter eingestellt. Ist der Pegel dagegen auf niedrig, hält sich das Rauschen in Grenzen und die Musik klingt durchaus hörbar.

Zum (vorläufigen) Schluss noch eine positive Meldung. Wie man im Bild unten sehen kann, hat es das Odys Space beachtliche 5 Tage, 14 Stunden und 18 Minuten ohne Akkuladung ausgehalten, bei täglich ca. 1 Stunde Benutzung (ohne WLAN, mit 2G / 3G Betrieb). Das der Akku immer in größeren Blöcken (und nicht linear) abbaut hatte ich bereits unten erwähnt. Dazu kommt, dass der Akku im letzten Drittel deutlich schneller abbaut als in den ersten beiden Dritteln. Schön zu sehen ist aber auch, dass 36% Akku nochmal für 6 Stunden ausreichen, in denen das Tablet ca. 3 Stunden aktiv benutzt wurde (ohne WLAN, mit 2G / 3G Betrieb).  Und es hätte noch länger durchgehalten, wäre da nicht das WLAN Modul. Bei genauer Beobachtung wird ziemlich schnell klar, dass das WLAN Modul ein echter Stromfresser ist. Nichtsdestotrotz ist die Akkuleistung beachtlich.

Update – 13.12.2011

Einige Leute vermissen sowohl den Android Market als auch den Flash Installer für ihr Odys Space Tablet. Hier findet ihr beide APK´s zum Download:

Android Market 2.3.6 – Download (apk)

Flash Player Installer 10.2 – Download (apk)

Beim letzten Amazon Cybermonday gab es das Odys Space Tablet für recht günstige 149 €. Wer bei dem Wort Tablet primär an ein iPad – und die Maßstäbe die es setzt – denkt, sollte am besten gar nicht erst weiterlesen. Das Odys Space ist ein Billigtablet – ein Vergleich mit Apples Tabletwunder ist nicht nur sinnlos, sondern auch ungerecht dem Space gegenüber.

Für alle Anderen folgt ein hoffentlich spannender Kurztest inkl. einiger Tipps und Tricks zur besseren Nutzung.

Der erste Eindruck…

…ist besser als erwartet. Das Space kommt in einer ordentlichen Verpackung  inkl. USB Kabel und zusätzlichem Netzteil. Sofort nach dem Auspacken fällt auf, dass das Tablet von einer Gummierung umgeben wird, einen schönen Hochglanzrahmen hat, leider aber auch einen recht breiten schwarzen Rand zwischen Display und Rahmen. Es liegt gut und kompakt in der Hand, ist erstaunlich leicht und passt sogar dank des 7″ Screens in die Innentasche des Sako.

Neben den 4 Androidtasten gibt es einen Ein-/Ausschalter (rechts), einen Lautstärkeregler (oben), daneben ein Resetloch, unten Mini-USB,  Netzteilanschluss und Kopfhörerausgang, sowie links die Slots für SIM- und Micro-SD Karte und ein eingebautes Mikrofon. Die Platzierung der Lautstärkeregler würde ich als suboptimal bezeichnen, denn im horizontalen 2-Handeinsatz muss man umgreifen um ranzukommen. Hält man das Tablet vertikal geht es mit dem Daumen fix. Die Tasten haben alle einen guten Druckpunkt und wirken hochwertig. Wer die Klappertasten aus so manchem aktuellen Sony Ericsson Smartphone kennt (die zudem locker das Doppelte kosten), wird hier in Begeisterungsstürme ausbrechen.

Leider trifft das nicht auf die 4 Androidtasten zu, die kapazitiv sein sollen. Das sind sie auch, nur leider fürchterlich ungenau und teilweise mit erheblicher Verzögerung (dazu später). So kommt es, dass die Home Taste ca. 1cm neben ihrer optischen Position erst reagiert. Da kann man sich dran gewöhnen, schön ist aber anders. Auch die Suchen Taste braucht etwas Überzeugung, Menü und Zurück verrichten ihren Dienst makelos.

Ausstattung, Performance und erste Bugs

Das Tablet kommt mit einer ganz guten Ausstattung daher. WLAN und 3G, 4 GB interner Speicher, Bluetooth, Kamera und Telefoniefunktion (“dank” Android 2.2). Irgendwo musste also gespart werden. Da wäre zum einen der schwache Single Core Prozessor (Qualcomm MSM7227-T ARM11, 800MHz) zu nennen, der den Anforderungen nicht immer gewachsen ist. Und der mit 512 MB definitiv zu kleine Hauptspeicher. Mit Android 2.2 hat man zumindestens die richtige Entscheidung in Sachen Betriebssystem getroffen. Alle neueren Varianten hätten das Space hoffnungslos überfordert. Die ohnehin schon vorhandene Überforderung macht sich besonders bei Videos bemerkbar. HD kann man getrost vergessen, alles “Kleinere” läuft je nach Codec und Optimierungsgeduld des Users so lala. Über das Display 7″ mit der leicht seltsamen Auflösung von 800×480 (16:9) lässt sich streiten. Es ist nicht schlecht, reagiert manchmal nicht beim ersten Mal, aber im Großen und Ganzen zu gebrauchen (ich erinnere nochmal an den Preis von 149 €). Leider spiegelt es sehr stark.
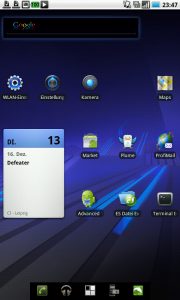
Wäre da nicht, tja wäre da nicht der erste richtig herbe Bug. Im vertikalen Betrieb haben die oberen 20% des Displays einen Versatz von locker 0,5 – 1 cm nach unten. Glücklicherweise lässt sich das zu einem großen Teil beheben, aber dazu später. Interessanterweise ist am unteren Ende nichts derartiges zu beobachten. Mein subjektiver Eindruck ist sogar, dass das Display nach unten hin besser wird. Denn ein großer Teil dieses Textes wurde mit der Bildschirmtastatur geschrieben und das ging wirklich 1A. Als Nächstes hat das WLAN Modul Probleme mit unverschlüsselten Netzwerken (Verbindungsabbrüche) und ist bei WEP Netzen ziemlich langsam. Eine Lösung gibt es dafür auch.  Highspeed darf man vom WLAN Modul ohnehin nicht erwarten, was aber nicht so schlimm ist, denn das Space könnte mit einem schnellen Draft-n Datenstrom nicht umgehen.

Etwas unsicher bin ich mir über die Akkulaufzeit. Ich habe das Tablet seit 4 Tagen nicht geladen, habe es aber nur selten mehr als 1h pro Tag benutzt. Mit Hilfe von Smart Battery Monitor konnte ich zumindestens beobachten, dass die Energie nicht stetig von Prozent zu Prozent fällt, sondern länger auf einem Wert verharrt um dann gleich mal 3-4% zu verlieren.

Nach der Inbetriebnahme vermisste ich zunächst den Android Market und war etwas erschrocken über die Performance der Android Oberfläche. Und damit sind wir schon bei der Problemlösung angekommen.

Bug fixing und generelle Optimierung

Als erstes sollte man sich umgehend das Firmwareupdate von der Odys Website und eine Micro-SD Karte besorgen (wird für das Update zwingend benötigt, 1 GB reicht). Die passende Anleitung gibts dort ebenfalls. Wie in der Anleitung beschrieben, sollte man beide Aktualisierungen durchführen (erst Modem, dann update.zip von der SD-Karte). Entgegen der Behauptung auf der Website war mein Space nicht mit der aktuellen Firmware ausgeliefert wurden.

Nach dem Update hat sich die Displayproblematik ganz erheblich verbessert, zu 100% weg ist sie aber nicht. Das WLAN Modul kommt jetzt mit unverschlüsselten Verbindungen zurecht und die Performance bei WEP ist gestiegen.

Und der Android Market ist da. Einfach so.

Die Oberfläche hat sich leider nicht beschleunigt. Abhilfe schafft hier eine alternative Oberfläche bzw. ein anderer Launcher. Ich habe zum kostenlosen ADW Launcher gegriffen und dem Honey Comb Theme. Damit sieht nicht nur alles besser aus, sondern es geht deutlich schneller. Zudem kann bis der Arzt kommt customizing der Benutzeroberfläche betrieben werden.

Um sich selbst einen Gefallen zu tun, sollte man einen anderen Browser installieren. Der vorinstallierte Android Standardbrowser ist nicht nur langsam, sondern auch unkomfortabel. Hier fiel meine Wahl auf den ebenfalls kostenlosen Browser Dolphin HD.

Fazit

Das Odys Space Tablet ist kein schlechtes Gerät. Es kann natürlich nicht mit HTC Flyer, Motorola Xoom oder Apples iPad(2) mithalten, aber wenn man sich auf das Gerät einlässt und bereit ist etwas Zeit zu investieren, so erhält man eine sehr mobile Schreib-, Lese- und Musikmaschine zu einem unschlagbaren Preis.

Firmware Update – http://www.odys.de/downloads/drivers/ODYS_Space-FirmwareUpdate20110930.zip

Anleitung zum Firmware Update – http://www.odys.de/downloads/drivers/ODYS_Space-Updateanleitung.pdf

ADW Launcher im Android Market – https://market.android.com/details?id=org.adw.launcher

Honey Comb Theme im Android Market – https://market.android.com/details?id=com.gfxandroid.honeycomb

Dolphin Browser HD im Android Market – https://market.android.com/details?id=mobi.mgeek.TunnyBrowser