Howto add a MIME type to IIS – broken download links when using IIS

Sometimes you´ll find yourself in the situation that users complain about broken download links on your website but you can´t figure out why. Because the files are there, the links are good and the webserver is working fine as well.

If your webserver is an IIS (Microsoft Internet Information Services) then it probably misses the MIME type for the file to download.

So here´s the solution:

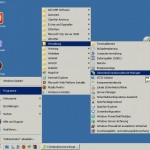
  1. Log onto your server and start the internet information services manager (IIS manager)
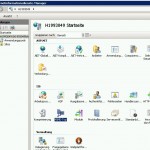
  2. Select your server from the connections panel on the left and double click MIME-Type in the IIS section of the panel on the right
  3. Now you can see all the MIME-Types that are already registered and known to the server
  4. Scroll down to see if your extension is already registered (e.g. “.7z” for the 7z compression standard)
  5. If your extension is already listed there, then this is not the solution for your problem. Sorry !
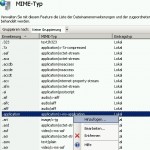
  6. If your extenion is not listed there then do a right click somewhere and choose “Add” from the menu
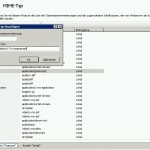
  7. Enter the extenion – for 7z it would be “.7z”, for ISO image it would be “.iso”
  8. Now enter the MIME-Type depending on what extension you want to register. For 7z it would be “application/x-7z-compressed” and for ISO it would be “application/octet-stream”.
  9. Test your download links – if it works, good. If not you have to restart your IIS.
  10. You´re done !

See the screenshots below to see what to do and where. They are from a german version of IIS, but the general structure is the same as in the english version.
 

WordPress Visual Editor broken after Update 3.3.1 (again)

Update 2 – 10.01.2012:

I was asked about the “Use Google Libraries” plugin for WordPress – here it is: http://wordpress.org/extend/plugins/use-google-libraries/

And this explains why you may wanna use it, even if your visual editor works fine: http://encosia.com/3-reasons-why-you-should-let-google-host-jquery-for-you/

Thx Dave !

Update – 10.01.2012:

Wow – I found a new method to fix it. But honestly I don´t believe in it and wouldn´t recommend it further. But for me it worked (NO joke).

I wrote this text below with the Wordpres iPhone App because I couldn´t use the web cause the visual editor was broken. And after this article was successfully posted from the iPhone, I tried the visual editor again. And now it worked. Crazy ?! I think so…

Grrrrrrrrr…after updating to 3.3.1 the visual editor is broken. Again. The same shit happened after updating to 3.3. Last time I fixed it by installing the “Use Google Libraries” plugin. This worked fine for 3.3. But it doesn’t seem to work for 3.3.1. And the WordPress support groups are not a real help. Definitely not…damn !!!

Typo3 install console / back end broken

When you are trying to access the Typo3 install console you need to create an empty file called “ENABLE_INSTALL_TOOL” within /typo3conf/ folder.  In some cases Typo3 deletes this file everytime you want to access the install console.

You can solve this by editing the file and insert the line “KEEP_FILE”.  After that, try to access the install console again and it will work.

If your Typo3 back end is broken (looks messy like the css is missing) after you did an update of your Typo3 installation (f.e. from version 4.1.3 to 4.4.1) head over to the /typo3conf/ext folder and look for an extension called “mn_ff3_be_bugfix”. Back it up to your local computer and then delete it on your webserver. Now load the back end again and now it should work.