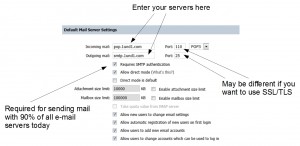
(only in german – sorry)
Update – 19.12.2011 (Verarbeitung, Sound, Akku)
Tja, wie so oft im Leben braucht man manchmal etwas länger, um etwas genau(er) bewerten zu können. In diesem Falle betrifft es gleich 3 Kategorien. Und nur bei einer gibt es Positives für das Odys Space zu vermelden. Fangen wir mal mit der Verarbeitung an. Nach der Installation einer Screenshot App auf dem frisch gerooteten Tablet schüttelte ich es um einen Screenshot auszulösen (wollte die App so). Und da klapperte etwas. Etwas Großes ! Ich war zunächst leicht ungläubig, doch ein erneutes Schütteln bestätigte meinen Eindruck. Irgendetwas Großes innerhalb des Tablets ist nicht richtig befestigt. Da sich das Odys Space leider nicht so leicht öffnen lässt, kann ich bis jetzt (noch) nicht sagen was es ist. Weiterhin ist es eine wahre Kunst das Micro USB Kabel so einzustecken, dass es tatsächlich in der Buchse bleibt und nicht sofort wieder raus rutscht. Sehr ärgerlich !
Der Sound über die eingebauten Lautsprecher ist ja gar nicht so schlecht. Der Kopfhöreranschluss wiederum hat einen seltsamen Bug, dessen genaue Ursache ich noch nicht herausfinden konnte. Offensichtlich kann Software-seitig zwischen verschiedenen Ausgangspegeln umgeschalten werden. Wie das genau funktioniert und wie man welchen Pegel selektiert – keine Ahnung. Ich konnte es bisher nur durch konsequentes Rein- und Rausziehen ändern. Denn ist der Ausgangspegel auf hoch eingestellt, rauscht der Kopfhöreranschluss unglaublich stark und die Musik klingt als wäre ein schlechter Telefonfilter eingestellt. Ist der Pegel dagegen auf niedrig, hält sich das Rauschen in Grenzen und die Musik klingt durchaus hörbar.
Zum (vorläufigen) Schluss noch eine positive Meldung. Wie man im Bild unten sehen kann, hat es das Odys Space beachtliche 5 Tage, 14 Stunden und 18 Minuten ohne Akkuladung ausgehalten, bei täglich ca. 1 Stunde Benutzung (ohne WLAN, mit 2G / 3G Betrieb). Das der Akku immer in größeren Blöcken (und nicht linear) abbaut hatte ich bereits unten erwähnt. Dazu kommt, dass der Akku im letzten Drittel deutlich schneller abbaut als in den ersten beiden Dritteln. Schön zu sehen ist aber auch, dass 36% Akku nochmal für 6 Stunden ausreichen, in denen das Tablet ca. 3 Stunden aktiv benutzt wurde (ohne WLAN, mit 2G / 3G Betrieb). Und es hätte noch länger durchgehalten, wäre da nicht das WLAN Modul. Bei genauer Beobachtung wird ziemlich schnell klar, dass das WLAN Modul ein echter Stromfresser ist. Nichtsdestotrotz ist die Akkuleistung beachtlich.

—
Update – 13.12.2011
Einige Leute vermissen sowohl den Android Market als auch den Flash Installer für ihr Odys Space Tablet. Hier findet ihr beide APK´s zum Download:
Android Market 2.3.6 – Download (apk)
Flash Player Installer 10.2 – Download (apk)
—
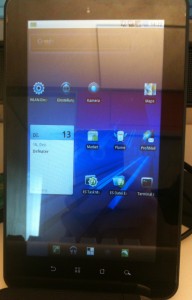 Beim letzten Amazon Cybermonday gab es das Odys Space Tablet für recht günstige 149 €. Wer bei dem Wort Tablet primär an ein iPad – und die Maßstäbe die es setzt – denkt, sollte am besten gar nicht erst weiterlesen. Das Odys Space ist ein Billigtablet – ein Vergleich mit Apples Tabletwunder ist nicht nur sinnlos, sondern auch ungerecht dem Space gegenüber.
Für alle Anderen folgt ein hoffentlich spannender Kurztest inkl. einiger Tipps und Tricks zur besseren Nutzung.
Der erste Eindruck…
…ist besser als erwartet. Das Space kommt in einer ordentlichen Verpackung inkl. USB Kabel und zusätzlichem Netzteil. Sofort nach dem Auspacken fällt auf, dass das Tablet von einer Gummierung umgeben wird, einen schönen Hochglanzrahmen hat, leider aber auch einen recht breiten schwarzen Rand zwischen Display und Rahmen. Es liegt gut und kompakt in der Hand, ist erstaunlich leicht und passt sogar dank des 7″ Screens in die Innentasche des Sako.
Neben den 4 Androidtasten gibt es einen Ein-/Ausschalter (rechts), einen Lautstärkeregler (oben), daneben ein Resetloch, unten Mini-USB, Netzteilanschluss und Kopfhörerausgang, sowie links die Slots für SIM- und Micro-SD Karte und ein eingebautes Mikrofon. Die Platzierung der Lautstärkeregler würde ich als suboptimal bezeichnen, denn im horizontalen 2-Handeinsatz muss man umgreifen um ranzukommen. Hält man das Tablet vertikal geht es mit dem Daumen fix. Die Tasten haben alle einen guten Druckpunkt und wirken hochwertig. Wer die Klappertasten aus so manchem aktuellen Sony Ericsson Smartphone kennt (die zudem locker das Doppelte kosten), wird hier in Begeisterungsstürme ausbrechen.
Leider trifft das nicht auf die 4 Androidtasten zu, die kapazitiv sein sollen. Das sind sie auch, nur leider fürchterlich ungenau und teilweise mit erheblicher Verzögerung (dazu später). So kommt es, dass die Home Taste ca. 1cm neben ihrer optischen Position erst reagiert. Da kann man sich dran gewöhnen, schön ist aber anders. Auch die Suchen Taste braucht etwas Überzeugung, Menü und Zurück verrichten ihren Dienst makelos.
Ausstattung, Performance und erste Bugs
Das Tablet kommt mit einer ganz guten Ausstattung daher. WLAN und 3G, 4 GB interner Speicher, Bluetooth, Kamera und Telefoniefunktion (“dank” Android 2.2). Irgendwo musste also gespart werden. Da wäre zum einen der schwache Single Core Prozessor (Qualcomm MSM7227-T ARM11, 800MHz) zu nennen, der den Anforderungen nicht immer gewachsen ist. Und der mit 512 MB definitiv zu kleine Hauptspeicher. Mit Android 2.2 hat man zumindestens die richtige Entscheidung in Sachen Betriebssystem getroffen. Alle neueren Varianten hätten das Space hoffnungslos überfordert. Die ohnehin schon vorhandene Überforderung macht sich besonders bei Videos bemerkbar. HD kann man getrost vergessen, alles “Kleinere” läuft je nach Codec und Optimierungsgeduld des Users so lala. Über das Display 7″ mit der leicht seltsamen Auflösung von 800×480 (16:9) lässt sich streiten. Es ist nicht schlecht, reagiert manchmal nicht beim ersten Mal, aber im Großen und Ganzen zu gebrauchen (ich erinnere nochmal an den Preis von 149 €). Leider spiegelt es sehr stark.
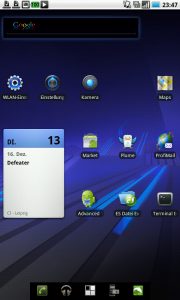 Wäre da nicht, tja wäre da nicht der erste richtig herbe Bug. Im vertikalen Betrieb haben die oberen 20% des Displays einen Versatz von locker 0,5 – 1 cm nach unten. Glücklicherweise lässt sich das zu einem großen Teil beheben, aber dazu später. Interessanterweise ist am unteren Ende nichts derartiges zu beobachten. Mein subjektiver Eindruck ist sogar, dass das Display nach unten hin besser wird. Denn ein großer Teil dieses Textes wurde mit der Bildschirmtastatur geschrieben und das ging wirklich 1A. Als Nächstes hat das WLAN Modul Probleme mit unverschlüsselten Netzwerken (Verbindungsabbrüche) und ist bei WEP Netzen ziemlich langsam. Eine Lösung gibt es dafür auch. Highspeed darf man vom WLAN Modul ohnehin nicht erwarten, was aber nicht so schlimm ist, denn das Space könnte mit einem schnellen Draft-n Datenstrom nicht umgehen.
Etwas unsicher bin ich mir über die Akkulaufzeit. Ich habe das Tablet seit 4 Tagen nicht geladen, habe es aber nur selten mehr als 1h pro Tag benutzt. Mit Hilfe von Smart Battery Monitor konnte ich zumindestens beobachten, dass die Energie nicht stetig von Prozent zu Prozent fällt, sondern länger auf einem Wert verharrt um dann gleich mal 3-4% zu verlieren.
Nach der Inbetriebnahme vermisste ich zunächst den Android Market und war etwas erschrocken über die Performance der Android Oberfläche. Und damit sind wir schon bei der Problemlösung angekommen.
Bug fixing und generelle Optimierung
Als erstes sollte man sich umgehend das Firmwareupdate von der Odys Website und eine Micro-SD Karte besorgen (wird für das Update zwingend benötigt, 1 GB reicht). Die passende Anleitung gibts dort ebenfalls. Wie in der Anleitung beschrieben, sollte man beide Aktualisierungen durchführen (erst Modem, dann update.zip von der SD-Karte). Entgegen der Behauptung auf der Website war mein Space nicht mit der aktuellen Firmware ausgeliefert wurden.
Nach dem Update hat sich die Displayproblematik ganz erheblich verbessert, zu 100% weg ist sie aber nicht. Das WLAN Modul kommt jetzt mit unverschlüsselten Verbindungen zurecht und die Performance bei WEP ist gestiegen.
Und der Android Market ist da. Einfach so.
Die Oberfläche hat sich leider nicht beschleunigt. Abhilfe schafft hier eine alternative Oberfläche bzw. ein anderer Launcher. Ich habe zum kostenlosen ADW Launcher gegriffen und dem Honey Comb Theme. Damit sieht nicht nur alles besser aus, sondern es geht deutlich schneller. Zudem kann bis der Arzt kommt customizing der Benutzeroberfläche betrieben werden.
Um sich selbst einen Gefallen zu tun, sollte man einen anderen Browser installieren. Der vorinstallierte Android Standardbrowser ist nicht nur langsam, sondern auch unkomfortabel. Hier fiel meine Wahl auf den ebenfalls kostenlosen Browser Dolphin HD.
Fazit
Das Odys Space Tablet ist kein schlechtes Gerät. Es kann natürlich nicht mit HTC Flyer, Motorola Xoom oder Apples iPad(2) mithalten, aber wenn man sich auf das Gerät einlässt und bereit ist etwas Zeit zu investieren, so erhält man eine sehr mobile Schreib-, Lese- und Musikmaschine zu einem unschlagbaren Preis.
—
Firmware Update – http://www.odys.de/downloads/drivers/ODYS_Space-FirmwareUpdate20110930.zip
Anleitung zum Firmware Update – http://www.odys.de/downloads/drivers/ODYS_Space-Updateanleitung.pdf
ADW Launcher im Android Market – https://market.android.com/details?id=org.adw.launcher
Honey Comb Theme im Android Market – https://market.android.com/details?id=com.gfxandroid.honeycomb
Dolphin Browser HD im Android Market – https://market.android.com/details?id=mobi.mgeek.TunnyBrowser
