God Mode in Windows 7

If you want to have all your system parameters and everything that can be adjusted within Windows 7 in one big folder, then you should create  the following directly on your desktop :

Desktop => New Folder => Name “XYZ” + “.{ED7BA470-8E54-465E-825C-99712043E01C}”

The new folder can have any name you want (in this case it´s “XYZ”) and you need to add this string to the folder name (including the point). When done, the symbol of the folder will change and when you double click it, you have everything you want in one big folder.

Note 1 :

This also works with Windows Vista but several crashes of the explorer have been reported, so use it only carefully.

Note 2 :

If you don´t want to mess up your desktop with a soo long folder name you can also create it in a subfolder on your desktop. But – some people reported crashes, so use it carefully.

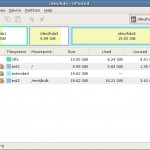
gParted Live CD – free kick ass partition editor / partition manager

gparted_1_big

Well I thought I wrote about this already but in fact I didn´t – anyway – if you´re looking for a kick ass partition manager / editor then be sure to check out the gParted Live CD.

It´s open source and therefore available for free at : http://gparted.sourceforge.net/.

If you need to do anything with your partition(s) – resize, move, delete, format, manually edit MBR and other crazy shit gParted Live CD is your choice. It boots directly from the CD, can also be adjusted to boot from a usb device and performs any desired action with your partitions.

T-Home MR 301 – Verwendung einer größeren Festplatte (Update)

Nach dem Update auf die neuste Version der Media Receiver Firmware 1.6.25281.6. (welches normalerweise automatisch durchgeführt wird), ist es nicht mehr möglich eine Festplatte größer als 500 GB zu verwenden. Dies äußert sich auch darin, dass nach dem Update der Media Receiver nicht mehr startet und in einer Endlosschleife hängen bleibt und ständig neustartet.

Um das Ganze wieder zum Laufen zu bringen, ist es erforderlich, die Partitionsgrößen der verbauten Festplatte (die weiterhin beliebig groß sein kann) zu ändern. Natürlich ist es unter diesen Umständen nicht besonders sinnvoll, eine Festplatte viel größer als 500 GB zu verbauen (auch vom Kostenfaktor her).

Aufbau einer Media Receiver Festplatte :

  • 1. Partition (ca. 150 MB, Dateisystem FAT 32) – Systemsoftware
  • 2. Partition (nicht größer als 500 GB, Dateisystem FAT32) – Aufnahmen

Es darf also die 2.Partition der Festplatte nicht größer als 500 GB sein.

WICHTIG : Mir ist es nicht gelungen, die 2. Partition zu verkleinern und alle Aufnahmen zu erhalten, da die Festplatte zu voll war und dementsprechend Aufnahmen weg mussten (denn Ausgangsgröße ca. 1,4 TB => Zielgröße 500 GB).

Was muss also gemacht werden ? (für Windows User)

  • MR 301 aufschrauben, IDE und Stromkabel abziehen (ggf. IDE -> SATA Konverter entfernen)
  • Festplatte mit Hilfe eines IDE -> USB oder SATA -> USB Kits mit dem PC verbinden
  • neue USB Festplatte wird erkannt und 2 Laufwerksbuchstaben werden zugeordnet (z.B. “G, H”)
  • Systemsteuerung -> Computerverwaltung -> Datenträgerverwaltung öffnen
  • Festplatte mit 2 Partitionen suchen (Laufwerksbuchstaben “G” & “H”)
  • die 2. Partition (“H”) löschen
  • neue primäre Partition erstellen mit Größe 500.000 MB, Dateisystem NTFS
  • wenn alles fertig, dann schliessen und Start -> Ausführen -> “cmd” eingeben
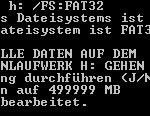
  • format h: /FS:FAT32 eintippen und dann warten, warten und nochmals warten
  • Festplatte wieder korrekt am Media Receiver anschliessen, 2-3 Reboots und alles läuft wieder

ntfs_formatDer Weg scheint beim ersten Lesen etwas umständlich und ist es in der Tat auch. Die 2. Partition wird erst gelöscht, danach als NTFS Partition mit der richtigen Größe (500 GB) aber dem falschen Dateisystem (NTFS) neu erstellt. Im Anschluss muss die Platte dann manuell über die Eingabeaufforderung mit erheblichen, zeitlichen Aufwand wieder in FAT32 zurück verwandelt werden. Mir ist es aber nicht gelungen ein Tool für Windows zu finden, welches FAT32 Partitionen größer als 384 GB erstellt. Bei einer 500 GB Festplatte würden damit aber 116 GB ungenutzt bleiben, was sicherlich nicht sinnvoll ist.

Einen ausführlichen Thread gibt es zu dem Thema natürlich auch im T-Online Entertain Forum.

Tipp

Wesentlich schneller und einfach geht das Ganze mit der gParted Live CD. Allerdings muss die Festplatte dafür direkt im PC per SATA oder IDE angeschlossen werden, oder man hat einen Rechner der die Festplatte schon beim Booten erkennt wenn sie per USB angeschlossen ist. Mit Hilfe der gParted Live CD kann die Partition direkt auf 500 GB verkleinert werden, ohne dass man den Umweg über NTFS gehen muss.

T-Home Entertain MR 301 Festplattentausch

(only in german – sorry)

Dieser Artikel basiert auf T-Home Entertain MR 300 Festplattentausch – bitte den Artikel lesen, ich werde hier nur sehr grob auf den Umbau des MR 301 eingehen, da er sich nicht groß vom MR 300 unterscheidet.

0.) Achtung Bug :

Seit Einführung der neuen Media Receiver Firmware 1.6.25281.6. sowie der Vorversion 1.625035.2 kann es nach Einbau einer größeren Festplatte dazu kommen, dass nach einem Neustart des Receivers alle Aufnahmen verschwunden sind – teilweise rekonstruierbar, teilweise nicht.
Im Forum von T-Home gibt es dazu unendliche viele Threads, ich habe mal die meiner Meinung nach wichtigsten verlinkt :
1.) Unterschiede zum MR 300 Umbau
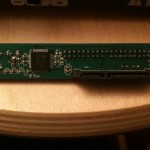
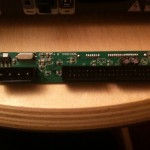
Zunächst benötigt man keinen IDE <=> SATA Adpater mehr, denn die original im MR 301 verbaute Festplatte ist bereits eine SATA und der passende Adapter kann einfach auf die neue SATA Festplatte aufgesteckt werden.
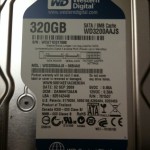
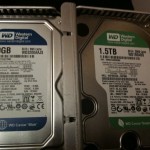
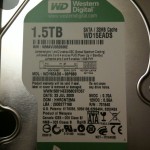
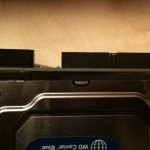
Weiterhin befindet sich im MR 301 eine 320 GB Western Digital Caviar Blue Festplatte. In meinem Beispiel verwende ich eine 1.5 TB Western Digital Caviar Green Festplatte – man sollte aber versuchen, an eine Western Digital Caviar Blue Festplatte zu kommen, da diese noch etwas energiesparender sind und das Netzteil des MR 301 doch recht empfindlich und nicht das Leistungsfähigste ist.
Foto9FotoFot2o
2.) Umbau Festplatte mit IDE <=> SATA Adapter und Isolation
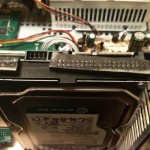
Der IDE <=> SATA Adapter ist mit einem isolierenden Schaumstoff versehen, damit die offenen Kontakte des Halbleiters nicht mit dem Metall der Festplatte in Kontakt kommen. Der Schaumstoff ist aufgeklebt und lässt sich mit einem flachen, scharfen Gegenstand ablösen (ideal ist ein Skalpel). Mit Hilfe von ein wenig Sekundenkleber habe ich ihn dann auf die neue Festplatte wieder aufgeklebt.
Etwas Vorsicht sollte man sowohl beim Abziehen als auch beim Aufstecken des IDE <=> SATA Adapters walten lassen, da man leicht etwas abbrechen kann. Also vorsichtig ziehen und leicht hin- und herwackeln.
Foto10Foto3Foto5Foto6
Einige Probleme hat mir der Stromstecker am IDE <=> SATA Adpater bereit, der sich partout nicht abziehen lassen wollte. Hier ist besondere Vorsicht geboten, da der Stecker bombenfest sitzt und im Zweifelsfalle die ganze Platine beschädigt wird wenn man zuviel Gewalt anwendet.
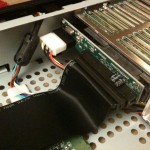
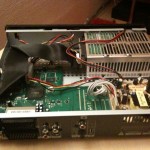
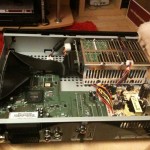
Der weitere Umbau unterscheidet sich nicht vom MR 300, Schrauben lösen (Sicherheitsbits), Gehäuse öffnen, Kabel zum Display abziehen, IDE <=> SATA Adapter abziehen, Plattenkäfig losschrauben, Platte losschrauben, alte Platte raus, neue Platte entsprechend mit IDE <=> SATA Adapter und Isolierung versehen, neue Platte rein, Plattenkäfig festschrauben, Kabel anstecken, Gehäuse drauf, verschrauben und fertig.
Foto11Foto12Foto7Foto8
Fragen zum Umbau ? Einfach in den Kommentaren posten.

Virtual Box

vbox2Recently I was looking for a virtualization software because I needed a virtual operating system to test stuff and a place to install iTunes where it couldn´t do any harm.

More accidentally I found Sun´s Virtual Box – which is free and open source. It´s small, fast, reliable, supports x64 virtual systems on a 32bit machine, runs on several plattforms (win, mac, linux, open solaris) and is very advanced in it´s functionality.

And did I mention that it´s free ?

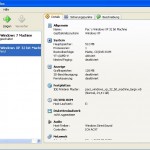
I´m using it with a Windows 7 x64, a Windows XP x64 and a Windows XP 32bit installation and in all 3 environments it runs great. For windows users it provides a nice graphical user interface.

vbox1It supports USB, LAN and IDE / SATA sharing – the guest with the host machine and a possibility to pass-through the devices directly to the virtual machine. Furthermore you can mount iso´s directly into the virtual machine and use them as boot device or simply as CD-drive.

The only thing I miss is a good Direct 3D integration. Though there is an (experimental) support for D3D, it doesn´t work to good practically. I tested it with some older games and most of them fail to recognize the virtual graphics adapter as a real D3D compatible graphic card. This is kinda sad, cause it would have been an easy possibility to enjoy older games in a Windows XP or a MSDOS virtual machine.

But as final conclusion – if you need a free, reliable and fast virtualization software, Sun´s Virtual Box is your pick.

Resizing a VirtualBox VDI image / hard disk

I´m using Sun´s VirtualBox for a while to host multiple Operating Systems on my machine. I discovered that it is not possible to re-size fixed disk images without doing a completely fresh install of that virtual machine. I found a quite helpful post at Nick Heppelston´s BizTalk Blog to solve this problem.

I found this fascinating quote today:

In my previous post I extolled the virtues of Sun’s desktop virtualisation software, VirtualBox. One thing niggled me though – I couldn’t easily expand a Virtual Disk Image (VDI) and was regularly reaching the space limits of the modest 20Gb disks I was creating; I needed an easy way of expanding disks before I could use it as my main virtualisation platform and felt comfortable in recommending it to my readers.modhul.com, Nick Heppleston’s BizTalk Blog, Dec 2009

You should read the whole article.

Windows XP 64bit

Well I heard many good things about Windows XP 64bit, especially in combination with dual core cpu´s and x64 designed applications. So I decided to install it on my Fujitsu Siemens Si 1520 notebook.

I prepared myself that this might be a little complicated but I didn´t expect such an nightmare. At first I got my hands on the Windows XP 64bit Superior Release, June 2009. It installs pretty smooth and really quick (about 20 minutes total) and recognizes nearly all of the devices.

But…drivers for all the not recognized devices are damn hard to find and in about 70% of the cases simply unavailable. A good try are the Vista x64 drivers – they may not work either ;-).

My installation of Windows XP 64bit didn´t recognize the beloved Conexant High Definition Audio Chipset. And who can live without sound today ? I couldn´t so I started to search the net for suitable x64 drivers. Fujitsu Siemens as manufacturer doesn´t support XP 64. They have a Vista x64 driver, but that one doesn´t work. I found a great variety of drivers in the net, though most of them didn´t fucking work.

It took me around 3 days to get the Conexant Windows Vista x64 driver working, (yeah I know it´s a Vista driver, but the XP 64 driver didn´t work) but than the epic fail. Sound from the internal speakers (sound like shit), but no sound out of the headphone plug. The red SPDIF light was there, but no SPDIF headphones in sight – and by the way – who the hell needs SPDIF headphones ?

I was pretty annoyed, searched the net again, found nothing, got angry and decided to modify the Vista x64 driver on my own. And after some modifications on the INF files there was SOUND – also out of the headphone plug. You can find the modified driver at the end of this article, with absolute no warranty for anything. It should work with nearly any Fujitsu Siemens notebook that has a Conexant High Definition Audio Chipset.

But there´s one important limitation. I didn´t manage to get the microphone plug working. I couldn´t find the correct routing within the INF files. Any help is appricated. The internal microphone is working, but not the microphone plug.

I also own a T-Mobile web’n’walk Stick 3 (a Huawei UMTS / HSDPA / 3G usb modem). Though T-Mobile provides an update for the device, I couldn´t get it working. Also not with the included XP 64 drivers ?!?!

My conclusion(s) so far :

+ fast and reliable operating system

+ great for dual core cpu´s in combination with a bunch of memory ( > 3 GB)

+ high speed on x64 applications

+ more “modern” than the antiquated Windows XP SP2 32bit

– driver compatibility is a nightmare

– driver support by the manufacturers is bad

– requires too much time to get all the things working

Modified Windows XP x64 Conexant HD Audio Device Drivers by Pac, October 2k9

Download : windows_xp_x64_conexant_hd_audio_device_drivers

Instructions & Notes : readme_first
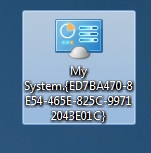
Photo Gallery back online

After some days of downtime, the Photo Gallery is back online.

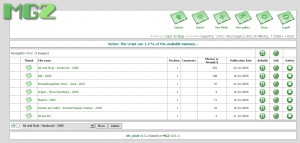
It now uses a very advanced version of MiniGal (MG2) called kh_Mod (current version 0.3.2.). If you are looking for a really lightweight photo gallery tool then kh_Mod is the perfect pick for you. It doesn´t require a database server – though it supports mySQL -, it´s really easy to install, has a rich admin interface and is easy to use. It´s based on PHP – give it a try. It´s worth your time.

admin_mg2_01(main screen of the admin interface)

Version 0.3.2. has a small bug concerning the PHP memory management. There´s a bugfix available from the author which will be included in release 0.3.3. In the meantime you can download it directly from the author´s site (just replace the file in the package with the one in the include directoy of your installation) :

http://www.tangata.de/kh_mod/files/pac/mg2admin_functions_033.zip

The latest release (0.3.2.) of kh_mod is here :

http://www.tangata.de/kh_mod/index.php?aktion=3&ln=en

(Thanks to Klemens for the great support !)