Firefox konnte nicht gestartet werden, weil die Anwendungskonfiguration nicht korrekt ist / Firefox failed to start because the application configuration is incorrect


After updating my Firefox to version 10 it refused to start. I tried a lot of things but nothing helped. Today I finally found a solution for this issue. It´s a problem with Microsoft Visual C++ 2005 and it appears mainly when you´re using Windows XP 32-bit with Service Pack 3. So here´s the solution:

1.) You need the Microsoft Visual C++ 2005 Service Pack 1 Redistributable Package ATL Security Update from here: http://www.microsoft.com/download/en/details.aspx?displaylang=en&id=14431

2.) Be aware that you download the correct package:

  • vcredist_x86.exe – for Windows XP, Windows Vista and Windows 7 (32-bit version – recommend for most users)
  • vcredist_x64.exe – for Windows XP, Windows Vista and Windows 7 (64-bit version)
  • vcredist_IA64.exe – for Intel Itanium based computers

3.) After the download finished, install the update

4.) Restart your computer

5.) Enjoy your working Firefox


BILD-Auslieferung verhindern!

(only in german – sorry)

Wer austeilen will, muss auch einstecken können!

Unter dem Motto „BILD für alle“ plant der Springer-Konzern am 23. Juni 2012,  anlässlich des 60-jährigen Bestehens der BILD-“Zeitung“, allen 41 Millionen deutschen Haushalten eine Gratis-Ausgabe zu liefern. Doch wir wollen dieses Blatt nicht einmal geschenkt haben, deshalb wehren wir uns.

 Nur mit einem Schreiben an den Springer-Verlag kann man einer Zustellung der Zeitung rechtswirksam widersprechen. Das Ziel unserer Initiative ist es, dass dies massenhaft geschieht, um den logistischen Aufwand dieser Propagandaaktion zu erhöhen und darüber hinaus die Auflage der BILD-“Zeitung“ und damit ihre Einnahmen durch Werbeanzeigen zu drücken.

 Doch das ist nicht alles: Wir wollen wieder eine öffentliche Diskussion über die Machenschaften der BILD und des Springer-Verlages anstoßen. Es darf nicht dabei bleiben, nur der Zustellung zu widersprechen. Es gilt mit kreativen Aktionen und inhaltlicher Konfrontation der BILD, ihrer Methode und Weltanschauung entgegen zu treten. (weiterlesen …)

Quelle: http://alle-gegen-bild.de/

Bitte alle mitmachen ! Danke. Und wem noch Argumente fehlen, der sollte sich das folgende Video zu Gemüte führen.

Petition: Namco-Bandai and From Software: Release Dark Souls PC Edition without Games for Windows Live

Why This Is Important

Games For Windows Live is unpopular, difficult to use, inconvenient, has terrible online support (a key feature in Dark Souls), and is downright unpleasant. After anxiously awaiting a PC release for this fantastic game it feels like a real slap in the face hearing Dark Souls will use Games for Windows Live. We recommend Valve’s Steamworks in place, as this DRM is much easier to use, less intrusive, more reliable, and more accepted among PC gamers. Please reconsider the use of GFWL, or offer the game on both services. Thank you for taking the effort to port this game, but for a lot of customers it’s Steam or no sale.

Source: http://www.change.org/petitions/namco-bandai-and-from-software-release-dark-souls-pc-edition-without-games-for-windows-live

Please participate ! Thx !

Geheimakte 2 startet nicht unter Windows 7 (64bit und 32bit)

(only in german – sorry)

Als ich neulich mal wieder Geheimakte 2 spielen wollte, verweigerte es unter Windows 7 nach der Installation hartnäckig seinen Dienst. Es kam immer die Fehlermeldung, dass es mit Administratorrechten ausgeführt werden muss. Schuld daran, waren die TAGES-Kopierschutztreiber.

Das Problem lässt sich aber glücklicherweise schnell beheben:

Geheimakte 2 ganz normal installieren. Danach die TAGES Treiber über die Links unten oder über http://tagesprotection.com => Drivers herunterladen. WICHTIG – es gibt unterschiedliche Treiber für die 32- und 64bit Versionen von Windows 7. Die Treiber als Administrator installieren (Klick mit der rechten Maustaste auf die Setupdatei und “Als Administrator ausführen”) und danach Geheimakte 2 ganz normal starten.

Viel Spaß !!!

http://tagesprotection.com/5.5/TagesSetup.exe (32bit Windows 7)

http://tagesprotection.com/5.5/TagesSetup_x64.exe (64bit Windows 7)


Smart electric drive – ein Fahrbericht

(only in german – sorry)

Vor kurzem hatte ich die Gelegenheit einen Smart electric drive zu fahren. Meine bisher erste, rein elektrische Fahrerfahrung (von einem Gabelstapler und ein paar elektrischen Hubwagen mal abgesehen). Und genau an das erinnert mich der Smart electric drive – an einen elektrischen Hubwagen.

Beginnen wir doch aber von vorn. Bevor ich losfahren konnte, musste ich das kleine grüne Gefährt von seiner Steckdose trennen. Das war ein Kinderspiel und buchstäblich nicht komplizierter als einen Stecker aus der Steckdose zu ziehen – auch wenn es sich in diesem Falle um einen Kraftstecker und Dose handelte. Die Steckdose im Smart wird mit einer Art Gummideckel verschlossen und der Tankdeckel zugeklappt.

Schlüssel ins Zündschloss, drehen und es passiert…nichts ! Stimmt nicht ganz, denn im Display am unteren Ende des Tachos baut sich ein Ladebalken auf und die 2 Rundinstrumente, eins für den Ladezustand der Batterie und das Andere für die aktuelle Entladung oder Rekuperation der Batterie, bewegen ihre Zeiger. Doch das wars dann auch schon. Kein Motorengeräusch, kein Zündungsprozess. Dafür können alle anderen erdenklichen elektrischen Verbraucher sofort in Betrieb genommen werden (Radio, Licht, etc.). So auch die Heizung, die mich dann gleich überraschte. Es war draußen angenehm kalt (so um die 5 – 6 Grad) und trotzdem strömte mir (22 Grad eingestellt, Lüfter Stufe 1) unmittelbar warme Luft entgegen. Elektroheizung eben.

Immer noch nicht ganz überzeugt davon, dass sich der Smart tatsächlich in Bewegung setzen würde, sobald ich meinen Fuß aufs Gas stelle, brachte ich den Automatikhebel in Position “D”(rive), löste die (manuelle) Handbremse und los ging es. Und wie es los ging !

Lautlos, mit der Geräuschkulisse des oben angesprochenen elektrischen Hubwagens. Irgendwo zwischen Raumschiff und Hubwagen. Bis 50km/h gab es dann tatsächlich auch etwas, was ich als Fahrspaß bezeichnen würde. Denn der kleine e-Smart machte keinen Hehl aus den Vorteilen eines Elektromotors. Volle Leistung, egal welche Umdrehung. Bei diversen Ampelrennen gegen jegliche Art von Konkurrenz fuhr ich immer mit einem dicken Grinsen davon. Und ich spreche hier nicht von 1 – 2 Meter Vorsprung, sondern locker von 4 – 5 Wagenlängen (bezogen auf Smart Maße). Das war Fahrspaß pur.

Nur leider endete dieser abrupt mit dem Erreichen der 50 km/h. Die Zeit bis die Tachonadel die 70 km/h passierte würde ich als lang, aber noch erträglich beschreiben (natürlich nur, wenn man seine eigenen 140+ PS Turbodiesel Maßstäbe gleich zu Hause lässt). Die Zeit jedoch, die ab 70 km/h bis 100 km/h (schneller hab ich die kleine Kiste auch mit guten Willen nicht bekommen) verging, war eine glatte Ewigkeit. Mehr als das. Diese Zeitspanne verdeutlichte so klar wie nichts anderes, wo die Grenzen des Smart electric drive liegen. Es ist ein Stadtauto, mit dem man sich in großen Städten von Ampel zu Ampel bewegt. Und nichts anderes. Selbst der kleine Ausflug auf die 100 km/h begrenzte Stadtautobahn war zuviel für den Kleinen. Denn wann immer ich eine kleine Beschleunigungsreserve brauchte (bspw. zum Einfädeln), so war da einfach nichts vorhanden. Schade.

Erinnert ihr euch noch an das Rundinstrument, dass die Entladung bzw. Rekuperation der Batterie anzeigt ? Ich bin mir sicher, dass Smart den Fahrer / die Fahrerin damit subtil zu einer ökologischen und ökonomischen Fahrweise bringe wollte. Das hat aus meiner Sicht mehrere Gründe. Zum einen ist das Instrument so angebracht, dass man praktisch immer mehr oder weniger drauf schauen muss (vorausgesetzt man schaut beim Fahren nach vorn). Zum anderen ist sehr deutlich erkennbar, wann die Batterie gerade kräftig Saft lassen muss (starker Ausschlag nach rechts in den Minusbereich) und wann die Batterie kräftig geladen wird (starker Ausschlag nach links in den Plusbereich). Sparfüchse werden ziemlich schnell versuchen, den Zeiger so wenig wie möglich nach rechts, aber so oft wie möglich nach links ausschlagen zu lassen. Auf mich traf das nicht zu. Denn erinnern wir uns – wo war gleich der Fahrspaß ? Richtig, bis 50 km/h. Und so kam es, dass ich regelmäßig “pedal to the metal” fuhr, am liebsten nach einer Rotphase. Der Zeiger krachte jedesmal heftig nach rechts und es war mir egal. Denn genau so machte der Smart eletric drive Spaß – als kleine Ampelrakete.

Ach ja, 3 Dinge muss ich noch ansprechen. Erstens hat man sowohl als Fahrer, als auch als Beifahrer verdammt viel Platz. Große Türen, leichtes Einsteigen, herrlich. Zweitens – der Kofferraum ist angenehm groß. Ein Ikea Sofa passt nicht rein, wohl aber 3 Kästen Bier Getränk eurer Wahl. Drittens – Gott ist die Kiste unkomfortabel !!! Ich dachte immer, der Roadster hätte ein straffes Fahrwerk bei dem jemand die Federn vergessen hat. Doch im Vergleich zum e-Smart ist das sanftes Gleiten.

Fazit:

Würde ich in einer (sehr) großen Stadt wohnen und müsste ich dort ständig von A nach B und hätte ich einen festen Parkplatz mit Kraftanschluss zum Aufladen, so könnte ich mir gut vorstellen, einen Smart eletric drive zu meinem Begleiter zu machen. Doch für alles was darüber hinaus geht, ist der e-Smart meiner Meinung nach keine ernstzunehmende Alternative.

P.S.: die Reichweite

Dazu kann ich leider keine konkreten Angaben machen, da ich nicht die Gelegenheit hatte ihn “leer” zu fahren. Nach meinen knapp 40km Innenstadt inkl. ca. 8km Stadtautobahn zeigte die Batterieladung ca. 79%. Mindestens 8 – 10% dieser Ladung gingen aber auf den besagten 8km Stadtautobahn drauf. Was sicherlich auch am Versuch lag, die Kiste auf 100+ km/h zu bringen.
Android on Samsung i8320 / H1 – H1droid / CyanogenMod

Update 2: This version is outdated ! Head over to http://samsungi8320.freeforums.org/ for newer and improved versions.

Update:

I had to change the link for the H1droid rom (step no. 3) – you can now find it here:

Download (tar, 101 MB)

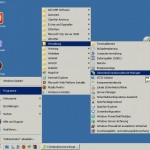
Recently I bought a Samsung i8320 / Vodafone H1 for cheap money on eBay. It´s quite good Smartphone with 16 GB internal memory. And there´s a CyanogenMod rom with Android Gingerbread 2.3.7 available. So here´s a short tutorial how to flash the phone. I did it on Windows XP, but it should also work on Windows 7.

All credits go to the great people at http://samsungi8320.freeforums.org, especially Clint and rogerbraun. Great work guys, keep it going !

Warning: There are several methods how to flash the Samsung i8320. With this method you´ll lose all the data on your phone. And in case you won´t like H1droid, there´s not an easy way back to the Samsung OS. If you wanna know more about the different methods go check out http://samsungi8320.freeforums.org.

0.) In case your phone has a micro sd-card installed be sure to remove it before you continue with this tutorial.

1.) Download Samsung Kies from this location http://samsung.de/de/consumer/kies.aspx and install it. Do not connect your phone to your PC.

2.) Download Odin from here and extract it to a folder on your hard drive. We´ll need it later.

3.) Download the H1droid rom from here (with Google Apps) or if you wanna be sure to have the latest version go there http://samsungi8320.freeforums.org/r3d4-latest-no-sd-card-needed-no-formatting-needed-t617.html (roms available with and without Google Apps) and save the *.tar in a folder on your hard drive.

4.) Start Samsung Kies and connect your phone via USB to the PC. Select “mass storage” (mode) if the phone asks. Wait until all drivers are successfully installed.

5.) Remove the phone from the USB cable, turn it off and close the Kies application.

6.) Restart the phone by pressing the following buttons at the same time: camera button + volume(-) button + power button. The phone should start and show you a black screen with “Downloading” and a blank status bar. If it does not, try again.

7.) Reconnect the phone via USB. If Samsung Kies will start automatically please close it.

8.) Start Odin and click the PDA button. Choose the H1droid rom from your hard drive (the i8320_no_sd_gapps.tar file).

9.) Hit start and pray. Odin will now try to flash your phone. If everything works well you´ll see the progress in the left upper corner. The former blank status bar should slowly start to grow and your phone will restart. While restarting you should see the CyanogenMod boot screen.

10.) Even if promted by your phone to choose a setup option for Android wait until Odin finished the process.

11.) You´re done. Enjoy H1droid !


The uploaded file could not be moved to – WordPress 3.3.1

Update – 25.01.2012

I still haven´t found a good solution for the problem. Several people report that they were able to solve it , by changing the owner of the “uploads” directory (to the user which php runs as (in most cases “wwwrun”). But that didn´t worked for me. The only solution I found was to run php as FastCGI and not as an Apache module. This solution though has some drawbacks. You need to configure a single php.ini for every virtual host you run and you can´t use .htaccess files anymore.

My conlusion – FastCGI resolves the problem but doesn´t cure the root of all that evil.

I guess the WordPress 3.3 and 3.3.1 are the worst releases the WordPress Team ever did. First the fucked up the visual editor and now the shittiest WordPress problem ever: “The uploaded file could not be moved to” – a problem occuring when you try to upload images/videos/media (and when your php runs in safe mode).

In older WordPress versions it could be easily solved by chmod 777 the “uploads” folder within “wp-content”. Now this doesn´t work anymore.

One solution is to chmod 777 “wp-content” completely. But they can´t be serious about that…can they ?

WordPress Visual Editor broken after Update 3.3.1 (again)

Update 2 – 10.01.2012:

I was asked about the “Use Google Libraries” plugin for WordPress – here it is: http://wordpress.org/extend/plugins/use-google-libraries/

And this explains why you may wanna use it, even if your visual editor works fine: http://encosia.com/3-reasons-why-you-should-let-google-host-jquery-for-you/

Thx Dave !

Update – 10.01.2012:

Wow – I found a new method to fix it. But honestly I don´t believe in it and wouldn´t recommend it further. But for me it worked (NO joke).

I wrote this text below with the Wordpres iPhone App because I couldn´t use the web cause the visual editor was broken. And after this article was successfully posted from the iPhone, I tried the visual editor again. And now it worked. Crazy ?! I think so…

Grrrrrrrrr…after updating to 3.3.1 the visual editor is broken. Again. The same shit happened after updating to 3.3. Last time I fixed it by installing the “Use Google Libraries” plugin. This worked fine for 3.3. But it doesn’t seem to work for 3.3.1. And the WordPress support groups are not a real help. Definitely not…damn !!!